Magento 2 Migration seems like a daunting task, but it has proved to be a relatively easy one. There are a couple of blog entries out there that speak about it and give some details, but I wanted to walk through how I’ve done it successfully several times now.
I strongly recommend doing this locally and testing before doing it on a live server but I’ll include both steps, either way.
Please note that upgrading is much easier if your base directory hasn’t been touched and theme modifications were done correctly during the initial build. Also, do NOT visit the frontend or backend of your website until told to do so. Visting the admin section before the frontend section is fully upgraded can cause a world of little problems and may cause you to have to comment out lines of PHP responsible for upgrades, because table names may have changed.
1. Back Up Magento and the Database
Hop onto the server with SSH and do [info]tar -czvf my_website.tar.gz my_website_directory/[/info]. This will create a gzipped tar of your website. If you have a huge website, make sure you have room on your server to back everything up.
Next, back up the database by: [info]mysqldump -u<username> -p <databasename> | gzip database.bak.sql.gz[/info]. You will be prompted for your mysql password and then it will take a moment to back up.
2. Block the Live Website
If you are upgrading directly on your live website you need to edit your .htaccess file:
#Order allow,deny

#Allow from all
Order deny,allow
Deny from all
Allow from YOUR IP ADDRESS
You can get your IP address from Google. This is not your server’s IP address. It will be your personal IP address that you are viewing the website from.
3. Download the Latest Version of Magento
[info]wget http://www.magentocommerce.com/downloads/assets/1.7.0.1/magento-1.7.0.1.tar.gz[/info]Replace the version number with the latest version of Magento, if necessary. However, in my experience it IS safe to upgrade from 1.4 all the way to 1.7 in one swoop. If you don’t have wget or your server (or localhost) throws an error, download wget. It’s great to be able to create an alias to download the latest version of platforms that you use often.
Unzip the latest version of Magento with [info]tar -xvzf magento-1.7.0.1.tar.gz[/info]. Side note here – the directory will be named Magento. If you’re doing this all locally and then going to push it up on your sever, DON’T zip your directory up as the same name as the one on your server, or you’ll blow stuff out. Name it carefully with website_upgrade or something obvious in the title.
4. Implementing the Upgraded Magento
Here, you’ll want to flush your cache and clear your old directories for the upgrade. Perform these commands on your server or within a terminal or command line program.
rm -rf var/cache/*
rm -rf downloader/pearlib/cache/* downloader/pearlib/download/*
rm -rf downloader/*
rm -rf app/design/frontend/base/*[/info]
Now, copy  the files from your new Magento install over into your existing one.
[info]cp -r magento/downloader/ downloader/
cp -r magento/app/design/frontend/base/ app/design/frontend/base/
Upgrading Magento
To make sure you’ve got the latest and greatest tools for the upgrade:
cp magento/mage .
chmod 755 ./mage
Follow these steps that you will find anywhere:
./mage mage-setup .
./mage sync --force
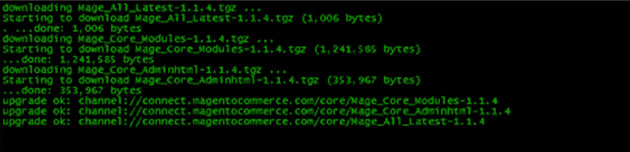
./mage install http://connect20.magentocommerce.com/community Mage_All_Latest --force
rm -rf var/cache/* var/session/*
rm -rf downloader/pearlib/cache/* downloader/pearlib/download/*
chmod 755 mage
php shell/indexer.php reindexall
./mage upgrade-all --forceNote that if you’re working on your localhost
php shell/indexer.php reindexallmight not work but you can run it afterwards if you have problems, no worries.
Preparing the Local Database
If you’re upgrading directly on your server you don’t have to worry about this step, but if not, pay attention to the following commands.
sed -e 's/www.website.com/mageupgrade.dev/g' your_current_database.sql > remove_www_upgrade.sqlThis command replaces everything in the database using “www.website.com” with “magentoupgrade.dev”. Here www.website.com is your website you’re replacing and magentoupgrade.dev is where your local instance is. What we’re trying to do here is make the website so that you can see and log into your website locally.
sed -e 's/\/:website.com/mageupgrade.dev/g' remove_www_upgrade.sql > remove_non_www_upgrade.sqlHere we’ve taken any instance without the WWW and replaced it with your local “mageupgrade.dev”.
sed -e 's/https:/http:/g' remove_non_www_upgrade.sql > final_non_https_upgrade.sqlFinally, import the final_non_https_upgrade into your database.
Upgrading the Magento Database
If you visit the front of your website now, the upgrade will take place. This may take like 30 minutes. Don’t refresh. Just let it spin. You will most likely be prompted with an error or two.
Go ahead and copy the file over so you can see the errors.
cp errors/local.xml.sample errors/local.xmlIf you get an error about integrity contraint violation, edit your app/etc/local.xml file with this and then refresh the frontend of your website.
Around line 41, edit the initstatements to:
<initstatements>SET NAMES utf8; SET FOREIGN_KEY_CHECKS=0; SET UNIQUE_CHECKS=0;</initstatements>Final Steps to Restoring Magento
Finally, check out your website, front and backend and don’t forget to change your permissions back on your .htaccess file.
Then run the following to correct all of your permission to the default.
find . -type f -exec chmod 644 {} \;
find . -type d -exec chmod 777 {} \;
chmod 755 mage
chmod o+w var var/.htaccess app/etc
chmod -R o+w media
chmod -R 777 var/package var/locks var/report var/export downloader
Troubleshooting Magento Errors
You may have errors or problems. There are some common ones out there. A quick Google search of the error is usually a quick fix. Keep in mind, on your first try, you may have to follow the process a few times in order to make it work. My first try took me a while.
You’ll want to to check your XML files and may have to move some stuff over from the user’s catalog.xml or page.xml over to local.xml. Also, be sure to keep your old theme’s files handy so you can reference it.
If you have questions, suggestions, or corrections – feel free to comment. And as always, if you want me to do it for you, shoot me an email and we’ll make it happen safely and securely. I usually charge around $600 for an upgrade, provided the base directory has not been drastically convoluted.